I thought it would be interesting to write a blog explaining exactly how I make one of my linocut prints. This print, called Vale Raking Light is a great candidate for a thoroughly nerdy piece with plenty of technical detail and hopefully some helpful ideas.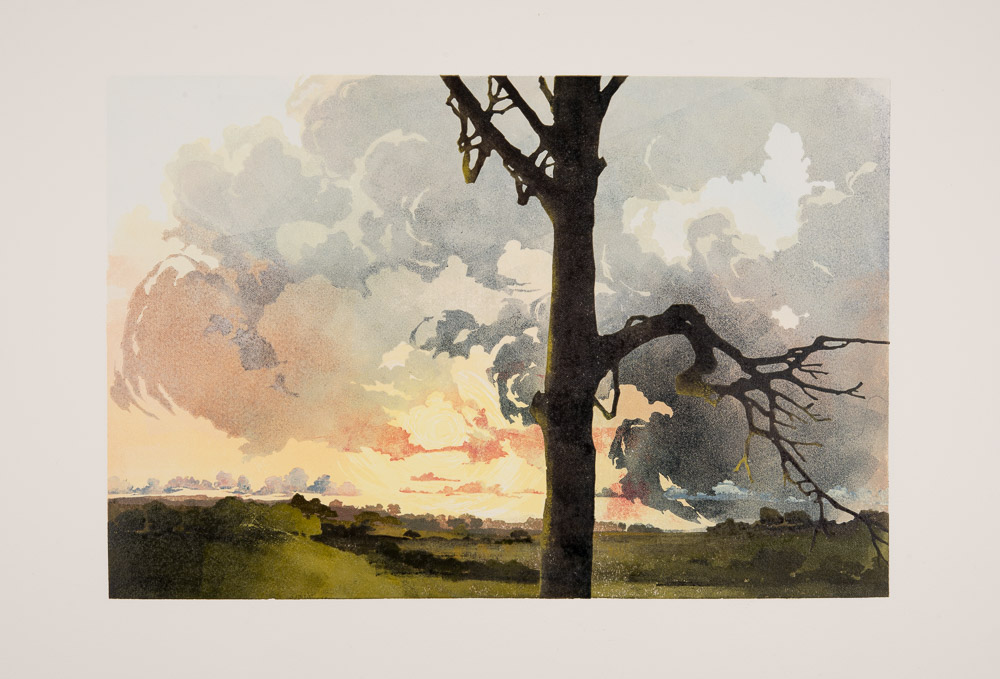
Maybe take a quick quiz to see if this blog is for you before you go on reading: you meet a person at a party who begins talking about the rag content of paper. Do you a) wonder in bemused horror how much scraping your host had to do at the bottom of the social barrel to come up with this freak or b) glow with pleasure as you give up the next two hours and all pretence of socialising while you pin down why Somerset may or may not trump BFK Rives. I leave you to judge, depending on your answer, whether to read on or not…
Raking Light is a reduction linocut using traditional artists/battleship lino, printed in oil-based inks onto Fabriano Rosaspina paper using an Albion printing press. By reduction printing, I mean that the whole print is created from one piece of lino (which I’ll refer to as the block in this blog). After each layer of colour is printed, more is cut from the block until the print is finally finished and the block destroyed. This print has fifteen layers of inking in all.
I use Intaglio Printmakers oil-based inks with the addition of their extender and cobalt drier. Extender adds transparency to the inks, like adding water to watercolour paint. A scant drop of cobalt drier to a tablespoon of ink will speed the drying time of oil-based from days to hours. I use oil-based ink because I find it much more sympathetic to colour mixing: what you see is what you get. With water-based ink, the colours look edgier and often darker on paper as opposed to the mixing slab and can look chalky with the addition of white. Importantly I can work light to dark and, less conventionally, dark to light with oil in ways impossible in water-based ink. I also avoid the danger of the paper cockling with damp ink. This can be a problem with water-based inks, especially since I often work with many layers of ink.
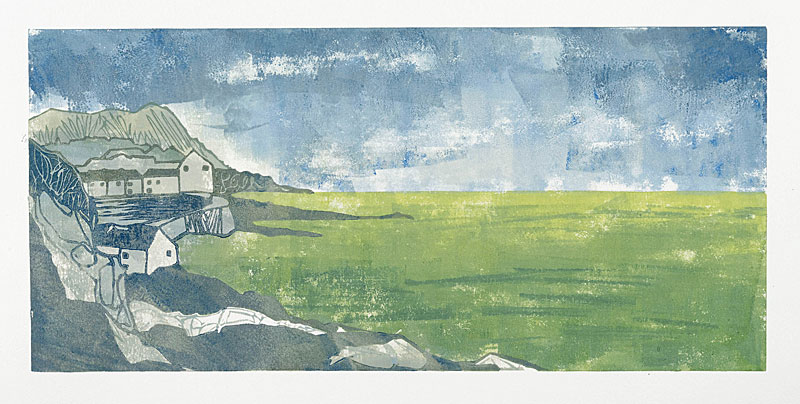
Raking Light began with a sky spotted from the car. I lurched to a halt on the road into Aylesbury and took photos on my phone. Usually I make sketches too, but not this time, not on the A413. I used these photos to work up this design drawing ready for transfer to the lino.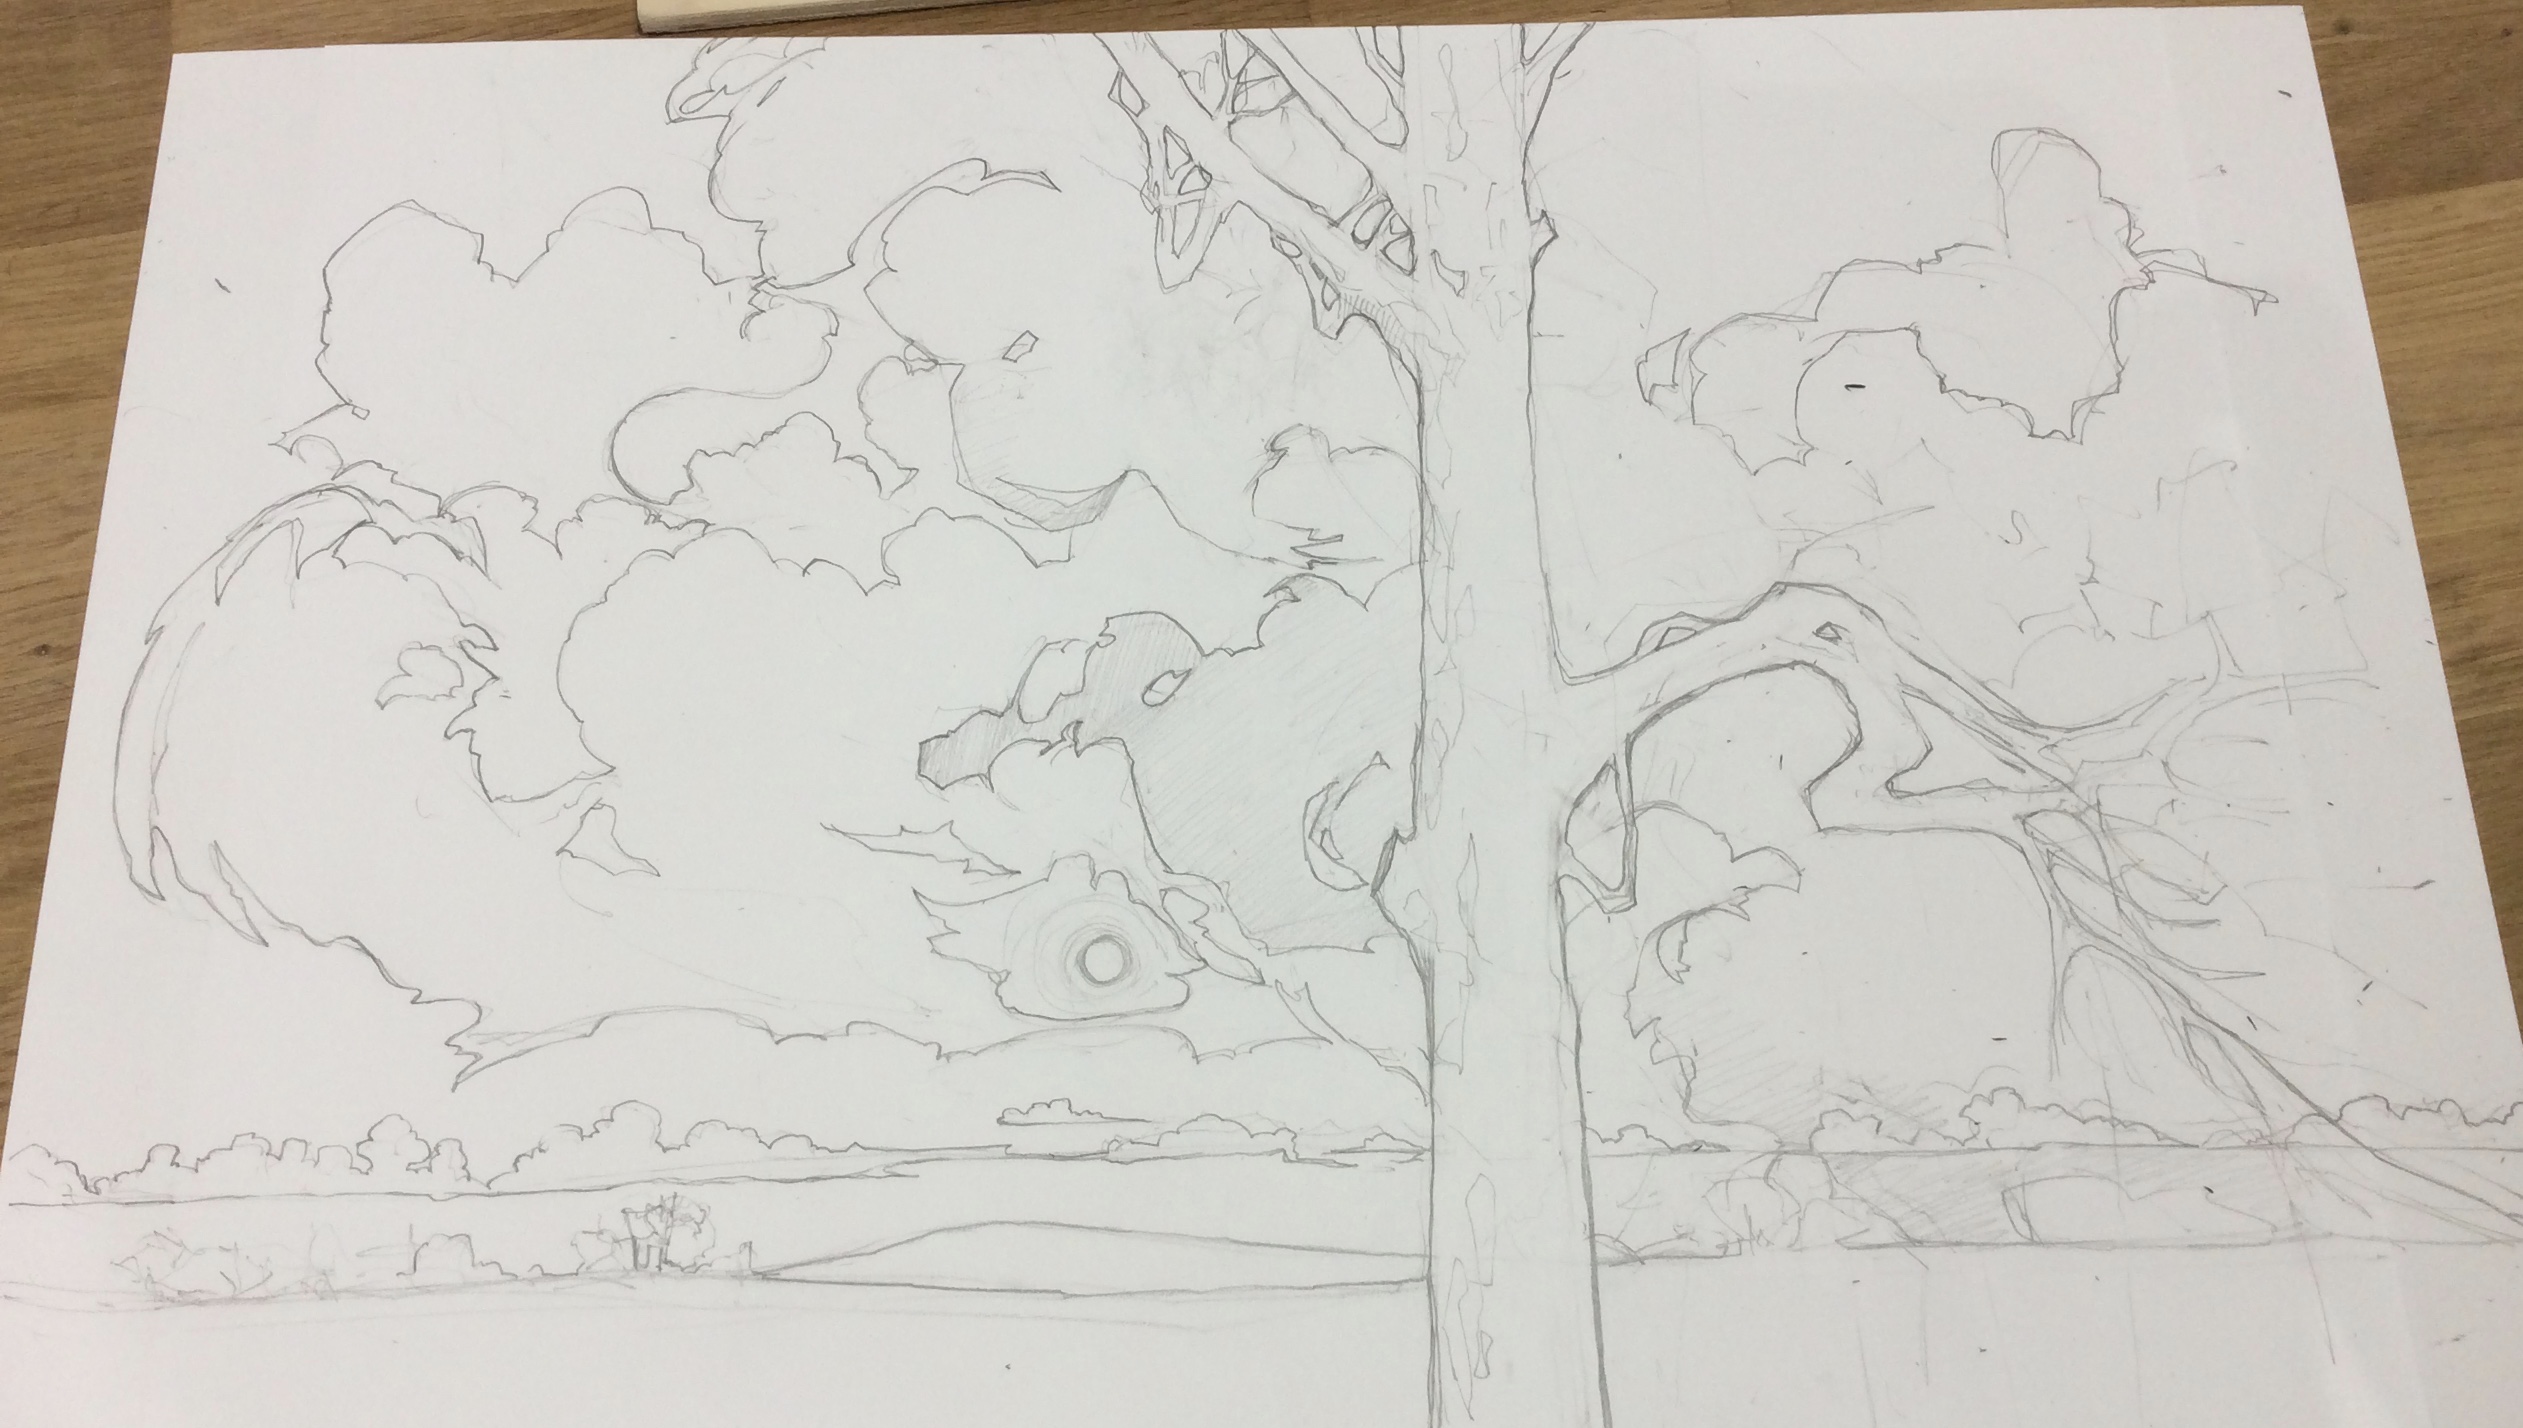 I assemble my landscapes in my studio with the help of source material. I’m far more interested in catching the feel of a place rather than making an accurate representation of a specific location. That way the viewer is free to make the landscape their own while I, in turn, am free to arrange the composition to my own satisfaction. You’ll see the land change shape later as the print progresses.
I made a tracing from my drawing to transfer the lino to the block. I use Polydraw plastic tracing film for all my tracings. Polydraw is completely stable, no swelling or cockling even if it is splashed with water, unlike conventional tracing paper. I flipped the tracing over to reverse it (so that the print would appear in the same orientation as the design drawing, rather than as a mirror image) and transferred it onto prepared lino using carbon paper. I prepare my lino by giving it a light sanding with fine sandpaper to key the surface and then stain it with red ink much diluted with white spirit. I wipe the dilute ink on with a cloth, leave it for a few minutes and then rub off the excess and wipe over with white spirit to finish. The carbon paper I use is office carbon and it can transfer to the print unless it is treated. To prevent transfer with oil-based inks, I leave the carbon to ‘set’ for an hour or so and then wipe over thoroughly with white spirit. This reduces, but doesn’t prevent, transfer when using water-based inks, for those I suggest making some sacrificial prints to allow the carbon transfer to fade before starting to print properly.
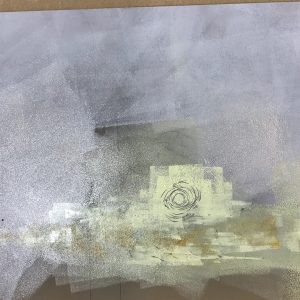 This photo shows the lino with the first layer of ink applied for printing. I used a combination of different rollers to apply the ink. Here I have at least three rollers on the go and am inking only where I feel it is appropriate. With this approach, you can either just add more ink between each impression, accepting that the image will become softened and blended with each application, or you can wipe down the block between each print so that the painterly application of ink is fresh in every print. I dot between the two methods depending on what I’m doing.
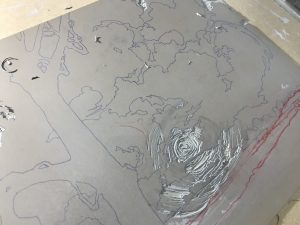 This is the lino showing my early cutting. The red is chinagraph pencil and the blue lines the carbon. I used the chinagraph to resolve the landscape as I went – it changed significantly right up until the end of printing thanks to how the work developed. I may start with a design drawing, but it is never set in stone and I often change and adapt as I go. I never make a colour study or plan of any sort either. This seat of the pants approach means I am constantly responding to what the work needs rather than being restricted by preconceptions.
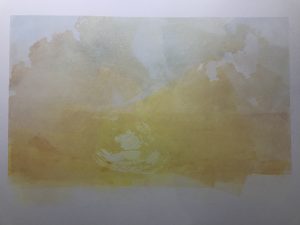 This is an early impression showing the mix of roller-applied colour in the sky. The ink is mixed with extender at about 95% extender for great transparency. Using so much extender comes at a price: it can make the ink sticky and stringy, flicking it up onto the bar of the roller where drops can drip back down onto the print (solved by keeping and eye out and wiping down regularly). This dilution also requires a good deal more work with the roller on the lino than normal to even out the ink if you want a smooth transparent layer. I use a little ‘tack reducer’ added to the ink to make it flow better and be less sticky. Tack reducer looks like Vaseline and a small amount added to oil-based ink will help it to flow on cold days and eases the stringiness of extender-heavy inks.
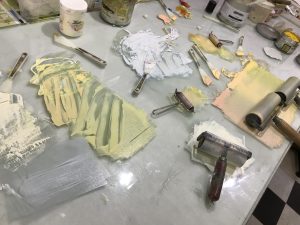 Here is my slab showing the various colours and rollers. I always mix using the previous colours as a part of the new colour. This started out as thrift in my student days, but now is more a matter preference for a harmonious palette.
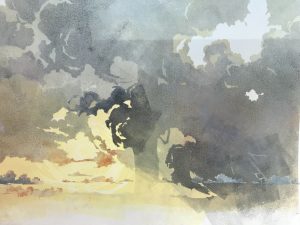 This picture shows the build up of the sky, very transparent and painterly. I enjoy the contrast between the definite cut line in my work and the vagaries of my inking. This makes for an edition where the prints all share the same colours and cutting, but the application of the ink varies. I have no issue with this, making numbered photos available for clients and galleries to select their preferred prints and have never had a problem commercially. If I reach a point where the variation pushes the notion of an edition too far, I will sell the prints as a series.
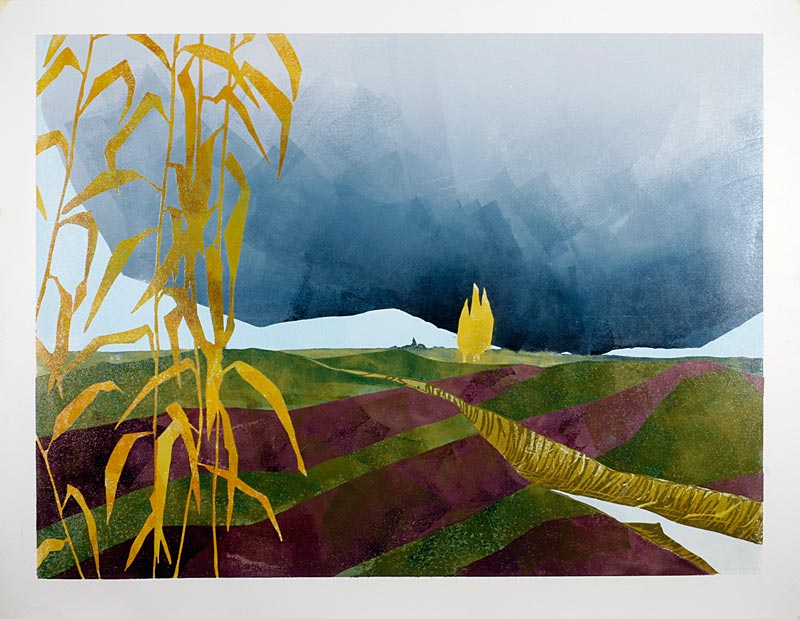
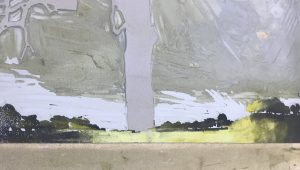
 This series of photos shows the build up of the landscape. The land remained a quandary and, if I’m honest a bit of an irritation, until I started work on it, then it became my favourite part of the print. The first couple of layers of land had almost as much extender as the sky to give it luminosity, but as I got closer to the foreground, I reduced the extender to less than 20% and then removed it all together for the last couple of layers. I didn’t decide what to do about the tree until the end, but kept my options open by putting on some ink at an early stage to see how it looked. I didn’t ink the tree at every stage so that it would stay crisp and detailed when finally printed. I always avoid over-inking areas of fine detail if I can.
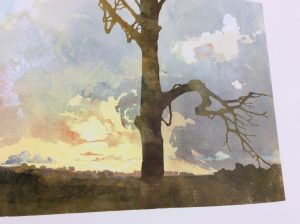
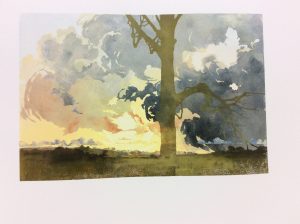
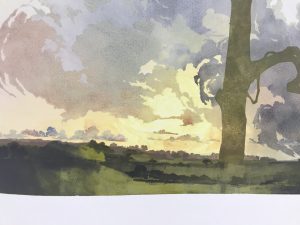
Below is the final result again showing the finished tree which I printed in one hit, highlights and all. I began with fourteen pieces of paper and ended up with fourteen finished prints. This takes a good deal of experience and nerve.
The reduction process doesn’t allow for test proofing or going back and printing more. If you are new to the process, either allow yourself some extra prints for mistakes or accept you could end up with a very small edition (I do remember going from twelve down to one back in the early days, necessitating a cry and probably some chocolate biscuits).
If you want to see the variation in inking you can look at the prints in succession here. Better still, if you’d like to buy one, click here. If you want yet more advice insight and help, you can scour my resources pages here or join me on Facebook or Instagram where you’ll find me as Laura Boswell Printmaker.